The Rackspace Private Cloud offering is based on OpenStack Essex. According to rackspaceopenstackprivatecloudsdk/ there will be a Folsom release later in Q4 2012
Curry says that before the fourth quarter ends, Rackspace will roll up a Folsom variant of OpenStack to create Private Cloud V2, and then it will do quarterly releases of the private cloud software. This software is continuously updated and patched as necessary if you pay Rackspace to manage it inside your own data center, and you can do quarterly updates if you want to DIY.
There current deployed version is 2012.1.3+stable-20120827-4d2a4afe-0ubuntu1
Installation Options
On Hardware, KVM or several VMware solutions. Virtualbox does not work (due to installer reporting missing virtualization extensions)
Installation Process
The documentation of the various options can be found in the Rackspace Knowledge Center. In this document the OSX VMware Fusion installation is used. The network settings for the local Fusion Installation can be found in
/Library/Preferences/VMware\ Fusion/vmnet8/dhcpd.conf
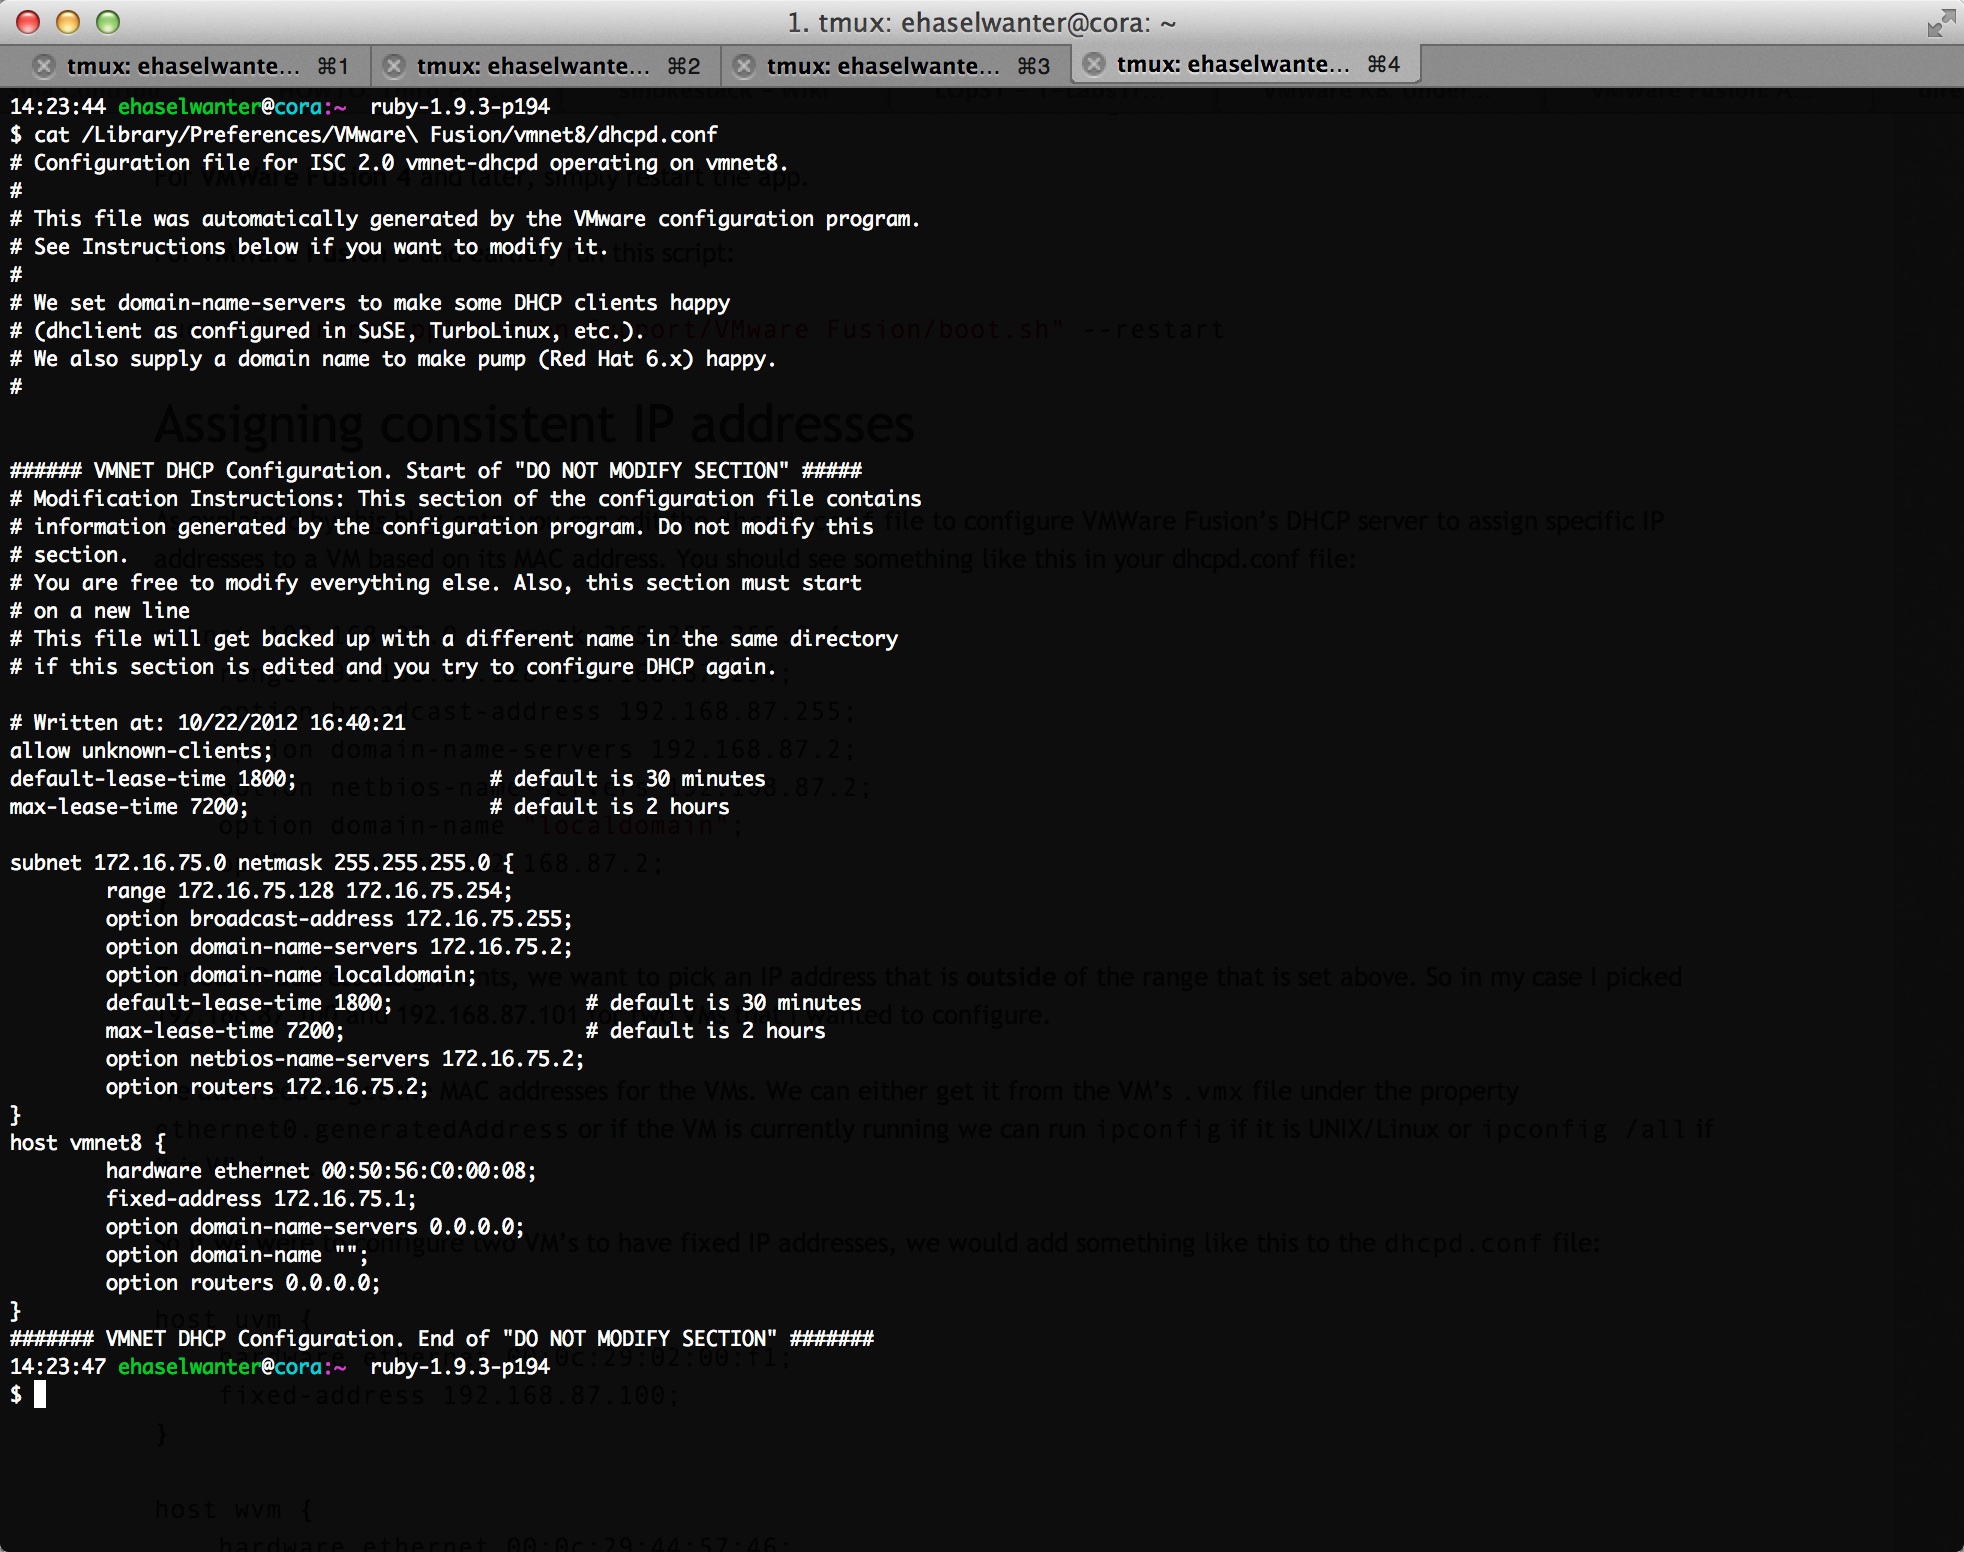
So in this case the nodes settings are:
control ip: 172.16.75.128
compute-1 ip: 172.16.75.129

Submetmask: 255.255.255.0

DNS: 172.16.75.2
Gateway: 172.16.75.2
You need to download the installation ISO image from Rackspace (registration is required and the download links is protected)
Installation Experience
The installation process is very manual. Each node has to be booted from an install medium (either iso, usb stick, dvd). The installer needs several input data which have to be provided during the install process. The install process itself is very robust.
Installation Steps
Setup VMWare Fusion Virtual Machines
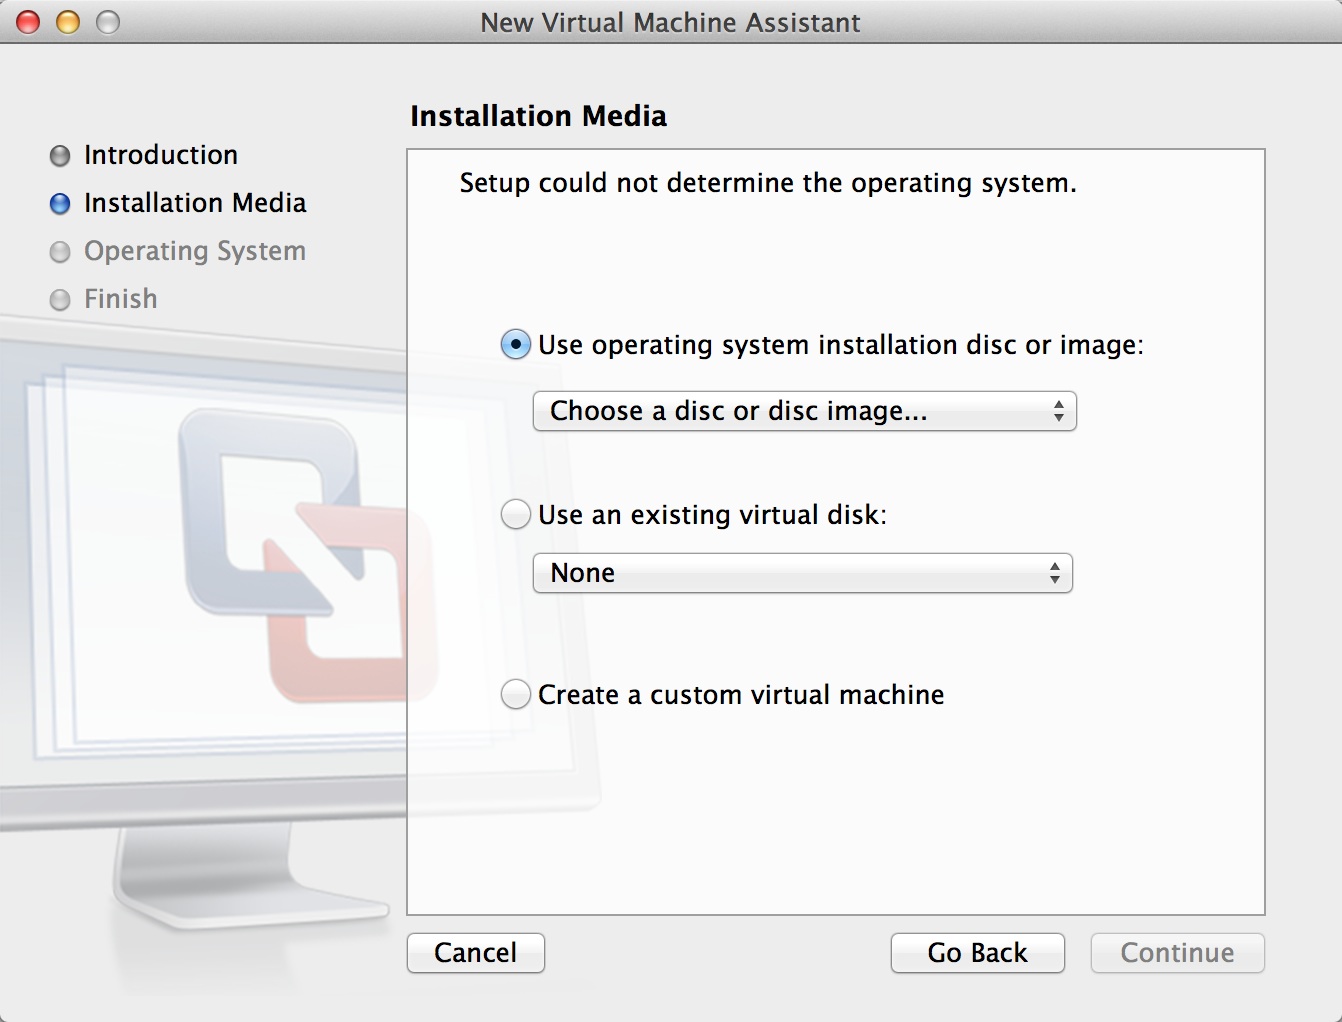
- In VMWare Fusion, create a new virtual machine. Click Continue without disc to move on to the Installation Media screen.
- Select Use operating system installation disc or image and click on the drop-down menu to navigate to and select the Rackspace Private Cloud Software ISO.
- Accept the default OS (Linux, Ubuntu 64-bit) and deselect the Easy Install option, if offered.
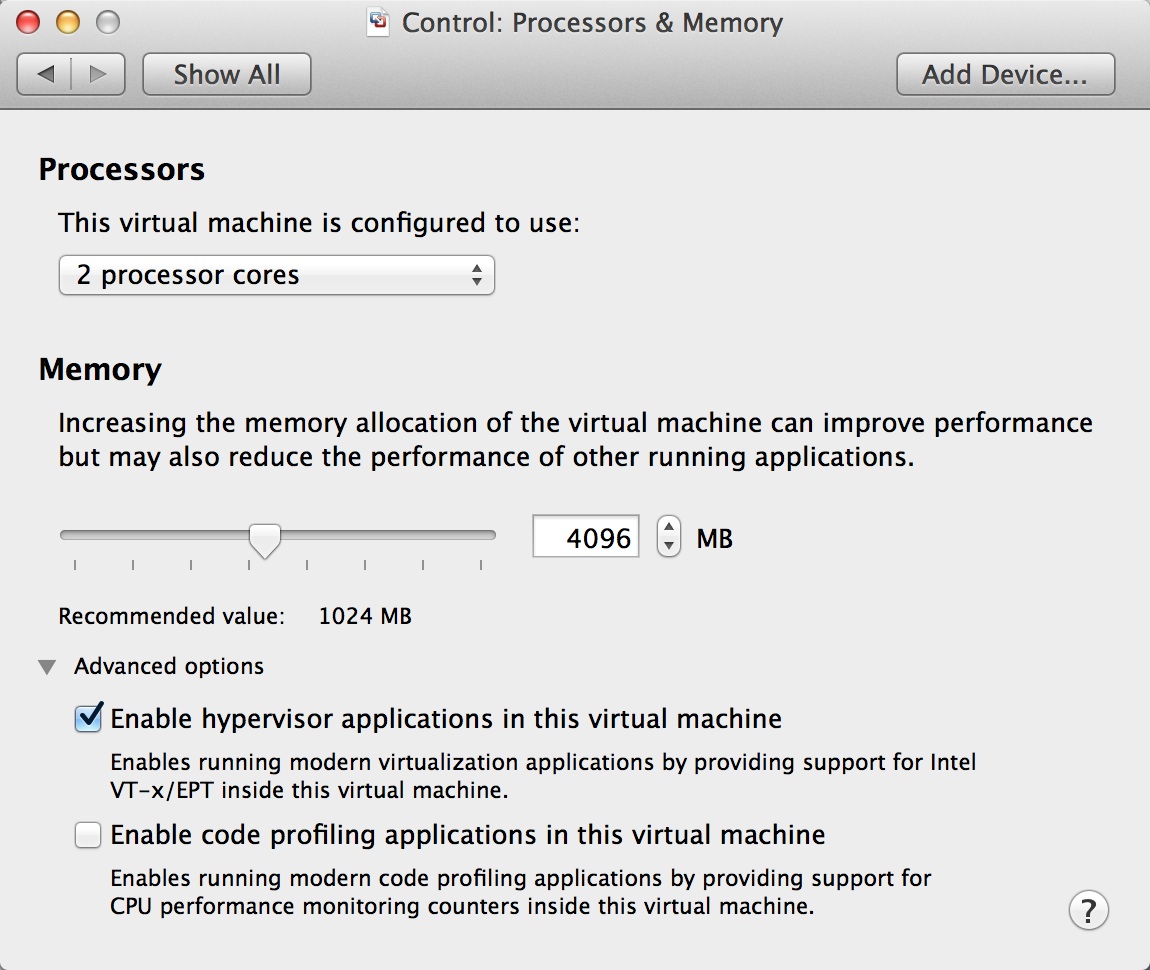
- Click Customize Settings to edit the following VM settings:
- Processors & Memory: Allocate 2 or more processors and increase VM memory to a minimum of 4 GB. More memory is preferred.
- Hard Disk (SCSI): Allocate a minimum of 20 GB.
- Edit the virtual machine’s .vmx file. To access it, you may need to right-click on its .vmwarevm file and select Show Package Contents.
- Change the value of vcpu.hotadd to “FALSE” and add the variable vhv.enable, setting it to “TRUE”.
vcpu.hotadd = "FALSE"vhv.enable = "TRUE"
There are two options, either all-on-one or one control node and several compute nodes. The nodes have to be connected to Internet and the network configuration has to be entered on every node.
Install Control Node
To install the control node launch the created virtual machine and accept the EULA. Next choose Controller as the role of this node.

The Alamo installer requires to setup networking in the install procedure. There is no DHCP so the installer prompts for a manual networking configuration.
First enter the IP for the Controller. The installer requires Internet access. In the VMWare Fusion setup his must be an IP from the virtual network setup

Next set the broadcast netmask:

The gateway is the .2 IP of the virtual networking:

The DNS server listens on the .2 IP of the virtual networking:

Choose a hostname for the control node:

Use the default setting for the fixed IP range (or choose one appropriate to your network)

The installer continues with the base installation and after a reboot starts the OpenStack installation:

On the control node a pristine chef-server image gets installed in a kvm environment and bridged to the local network. The Rackspace chef recipes are uploaded to the server and the a chef-client run is triggered on the control node.

After successful installation the installer prompts with a status page:

After the chef-client run a working OpenStack control node is installed. The nova dashboard is accessible on a self signed ssl connection on the nova control node at 172.16.75.128
root@admin:~# nova-manage service list
2012-10-29 07:52:21 DEBUG nova.utils [req-bffdb3d1-cd7f-4efa-8628-65760e598023 None None] backend <module 'nova.db.sqlalchemy.api' from '/usr/lib/python2.7/dist-packages/nova/db/sqlalchemy/api.pyc'> from (pid=19772) __get_backend /usr/lib/python2.7/dist-packages/nova/utils.py:658
Binary           Host                                 Zone             Status     State Updated_At
nova-scheduler   admin                                nova             enabled    :-)   2012-10-29 11:52:12
nova-cert        admin                                nova             enabled    :-)   2012-10-29 11:52:16
nova-consoleauth admin                                nova             enabled    :-)   2012-10-29 11:52:20
No we can access the dashboard at 172.16.75.128:

Finally we have to add a floating IP range on the control node:
# create floating ips so dashboard does not complain
nova-manage floating create --ip_range=172.19.5.0/24 --pool=floating-ips
Install Compute Node
The installation process is the same as for the control node. Additionally the IP of the control node has to be entered.

After a successful installation a status page is shown:

Use deployed OpenStack Environment
Before using the deployed OpenStack environment a floating ip range has to created. There are already two images ready to use: ubuntu 12.04 and cirrus. Starting instances works as expected.
Not in Scope of the Installer
- No bare metal provisioning included. Additional nodes are added with booting from the installation medium.
- No network config management. Networking has to be up and running (incl. IP address management for the bare metal nodes)
- No Monitoring/Alerting deployed
- No Swift
The Chef Cookbooks
The cookbooks used in the installer are at https://github.com/rcbops/chef-cookbooks. The cookbooks themselves offer a lot more functionality as the installer. There are cookbooks for monitoring (collectd) and a much more fine grained role system than offered through the installer. There are cookbooks for swift as well.
Screencast of the Installation
Possible next steps
- Deploy OpenStack from a Chef Server deployment without the Rackspace Alamo Installer.
- Add other roles (e.g. collectd)
- Try to extend functionality (e.g. integrate nagios or any other altering toolchain)
- Deploy Swift with Rackspace cookbooks
- Compare Rackspace Cookbooks with Opscode Openstack Project Cookbooks
Interested in Cloud or Chef Trainings? Have a look at our Commandemy Trainings page. Need help migrating to the cloud? Check out Infralovers.
comments powered by Disqus